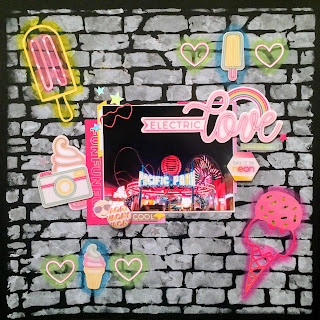
Electric Love
Hello everyone!
Today is the Clique Kits Instagram Pep Rally on Instagram and I am sharing the project I created to showcase the August kit called Malibu. This kit features the Pink Paislee Summer Lights collection and I love all the neon light inspired items and wanted to highlight that in my layout. I wanted to create the look of neon lights on a brick building.
To start my layout, I googled a simple image of a brick wall that I could create into a cut file to act as a stencil. I then uploaded it to the Cricut Design Space and removed the portions I didn't want to create the stencil.
The very center of the cut file did not turn out very crisp but I knew I would be putting my picture there so I didn't bother to fix it. After the image was cut out, I laid it on a piece of black paper and secured it with washi tape then used a wet wipe to apply some white Dylusions paint. Here is a picture of the stencil after I applied the paint.
I then cut out two images to use as the neon signs on my "wall". The ice cream cone is from the Clique Kits shop which is free to subscribers. It came as multiple ice creams but I cropped it so I had just one. The popsicle is an image I found in an online search and I created the cut file just as I did with the brick wall stencil. I then used some gelatos to go around the images to make it look as though the images were glowing just as a neon light would in real life.
I then did the same with the two chipboard pieces in the opposite corners. I also fussy cut two of the neon hearts from paper #11 and again used gelatos to highlight them. Once all were outlined, I glued them all down and moved on to the final stage, adding my photo.
With all the neon lights, the sticker that says Electric Love was the perfect title for the layout. I picked all my favorite neon light themed pieces from the kit and added some clusters around the page and that is it! I did not journal on this page but I may do so later by using a white pen and create a boarder around the page with my writing or I may just add it to a different page as I will have a few layouts from this memory. Here are some close ups and the final layout.
I hope you enjoyed the layout and thank you so much for stopping by!
~Kayla


Comments
Post a Comment